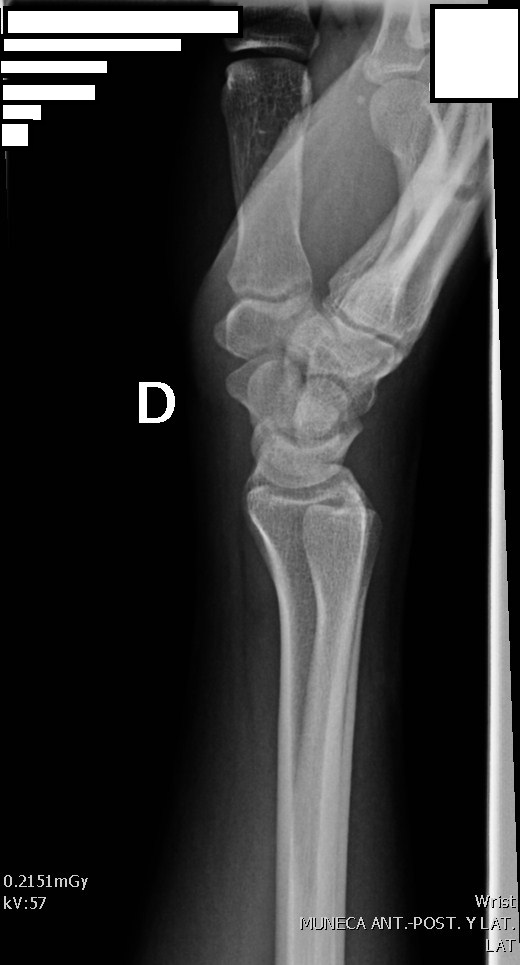
LATERAL WRIST PROJECTION
Standard lateral projection for bone and joint evaluation of the wrist
Importance of Lateral Projection
The lateral wrist projection is fundamental in radiological wrist study because:
- Allows evaluation of carpal alignment in sagittal plane
- Shows articular relationships radio-carpal
- Detects fractures not visible in PA
- Evaluates dislocations and subluxations
- Visualizes foreign bodies in profile
- Completes two-dimensional study of the wrist
Exposure Factors
Low for good bone contrast
Moderate exposure
Optimal parameters: Configured for detailed visualization of bone structures in profile
Radiographic Plate Optimization
18 × 24 cm divided transversely into 2 portions
- Purpose: Perform 2 projections on the same plate
- Projection 1: PA of wrist
- Projection 2: Lateral of wrist (this technique)
- Advantage: Cost and time reduction
- Consideration: Ensure correct placement in each half
- Technique: Use diaphragm to limit beam to each half
Visible Anatomical Structures
Should be clearly observed in true lateral projection:
- Distal end of radius and ulna
- Complete carpal bones
- Metacarpals (proximal end)
- Radiocarpal joint
- Intercarpal joints
- Carpometacarpal joint
- Preserved joint spaces
- Bone ridges and cortices
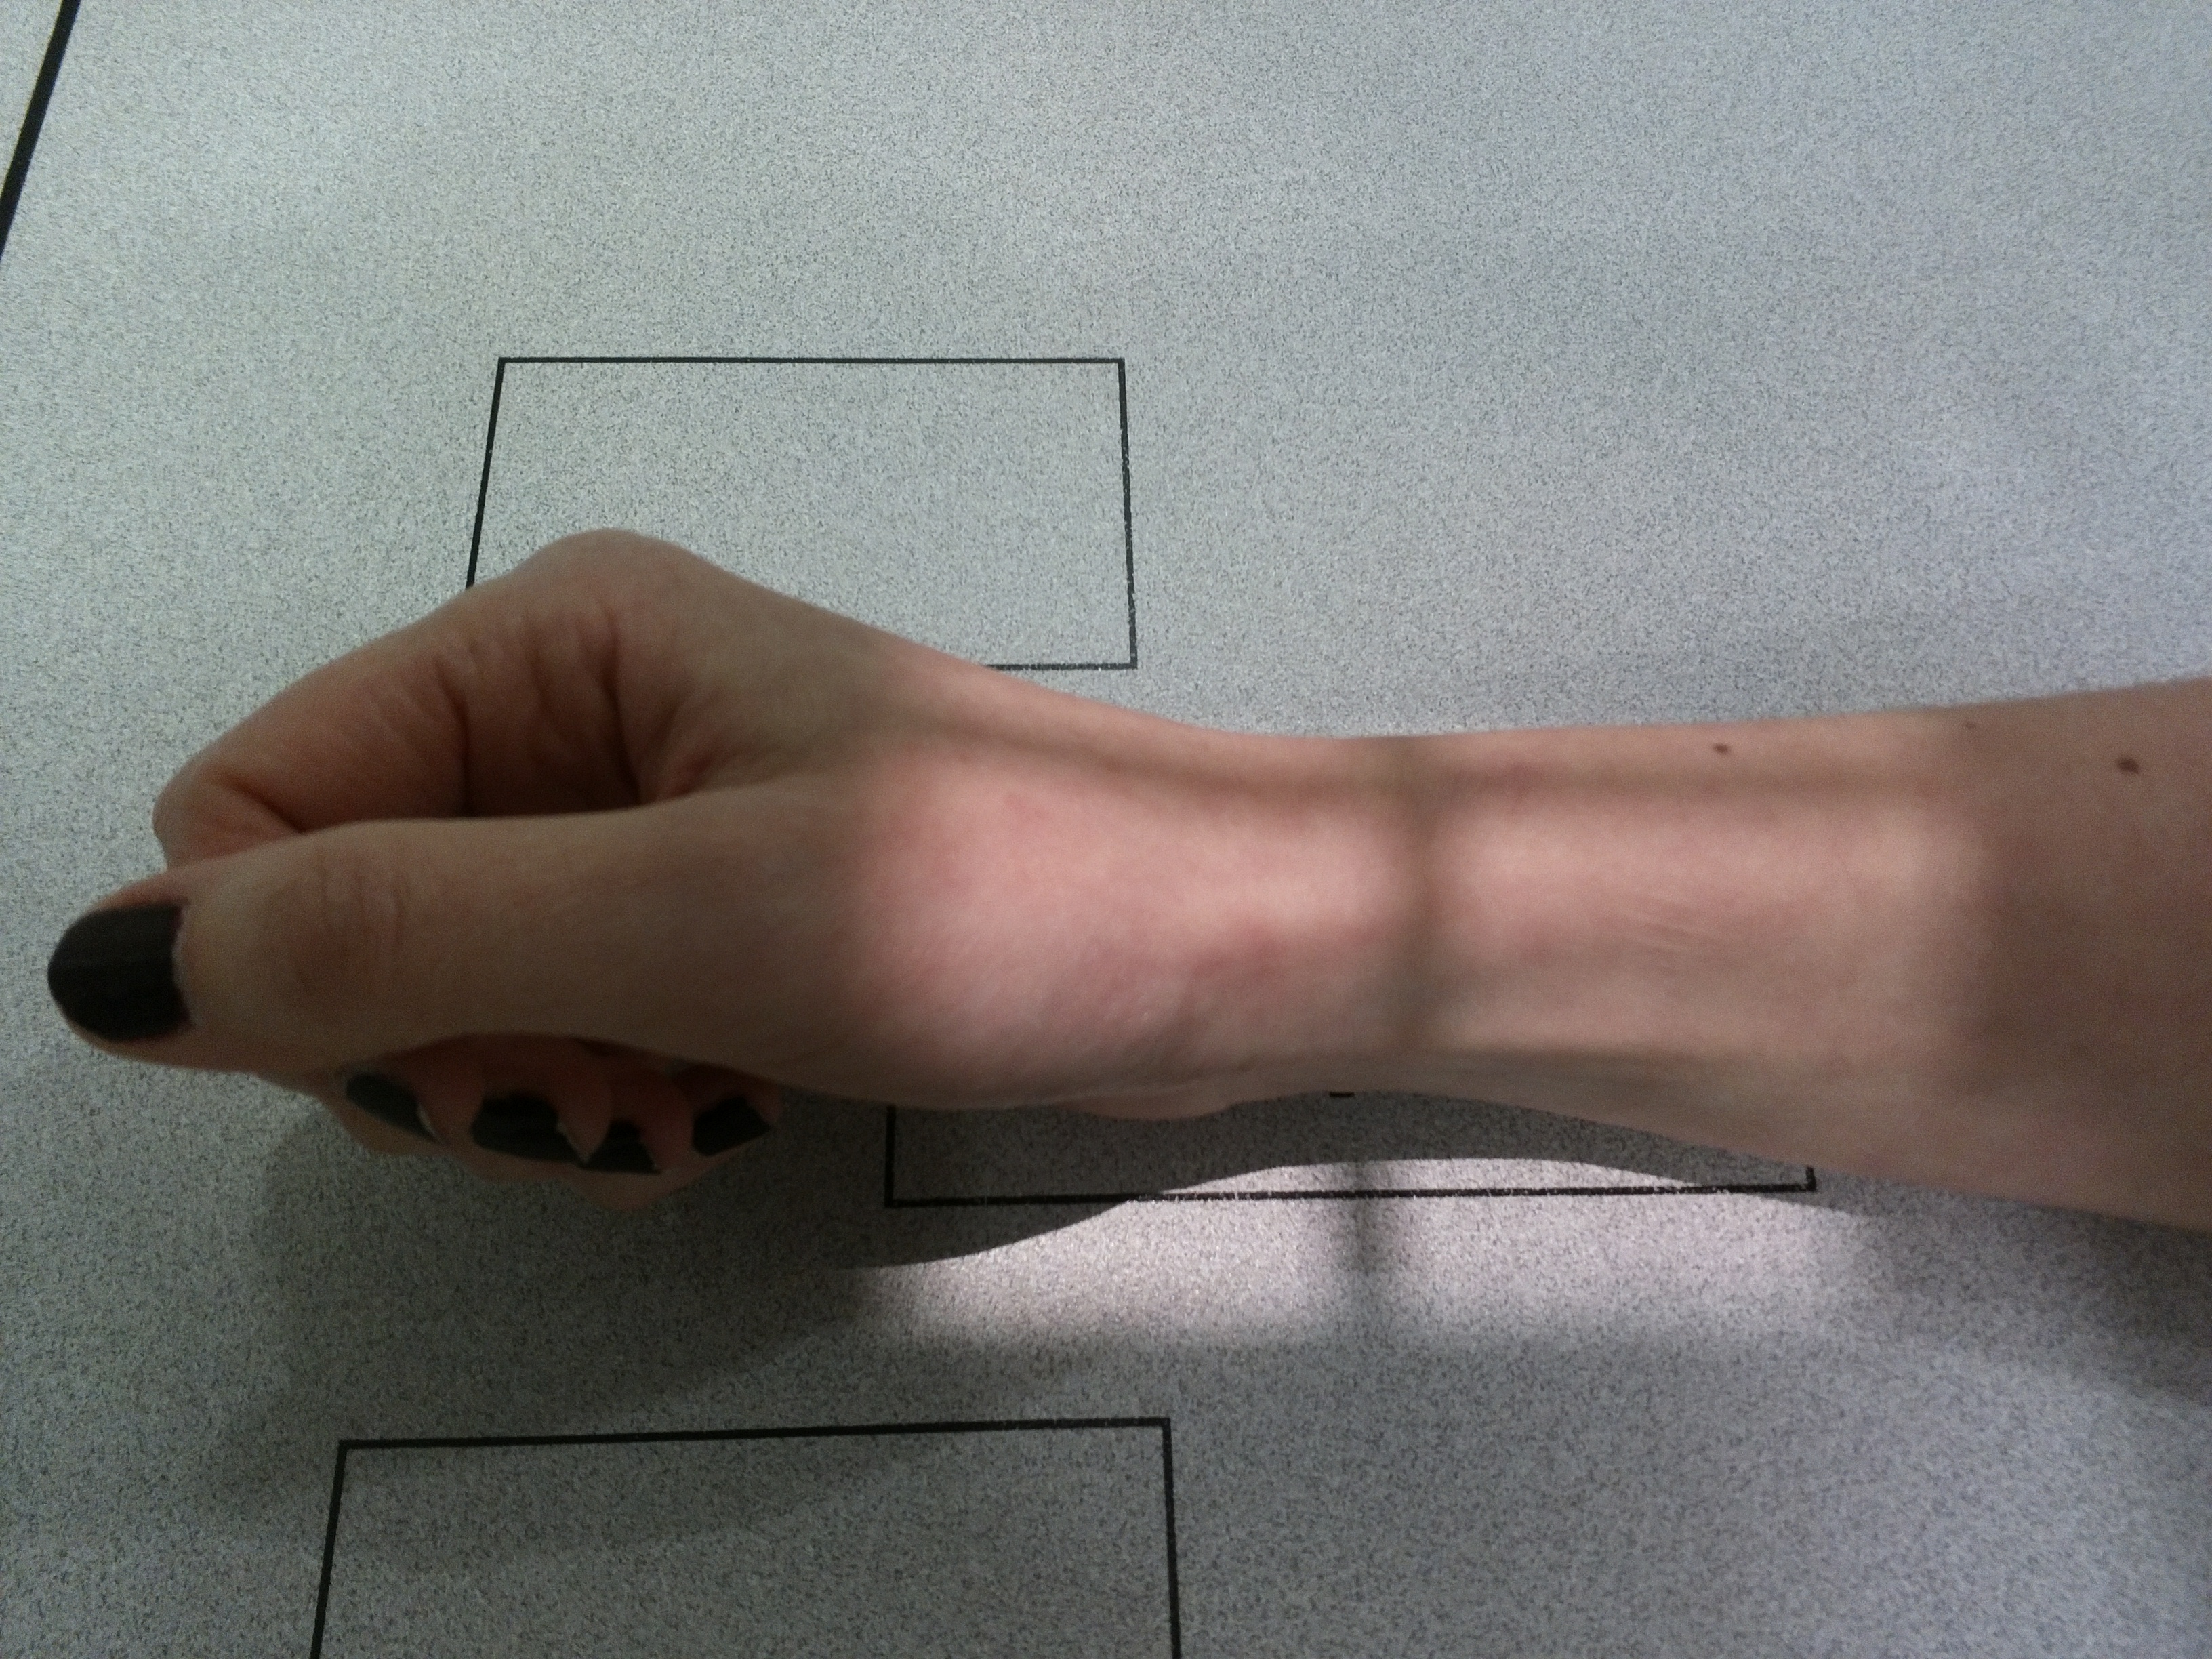
Patient Positioning
Thumb position: Upwards to avoid overlap with carpus
Central Ray
Centered on carpal area
Characteristics:
- Direction: Vertical and perpendicular to plate
- Target: Center of carpal area
- Angulation: 0° (no angulation)
- Purpose: True lateral projection without distortion
Optimal Image Criteria
Correct Alignment
Superimposition of radius and ulna
Preserved anatomical axes
No wrist rotation
Visible Structures
Carpal bones clear
Open joint spaces
Sharp bone contours
Complete Inclusion
Distal radius and ulna
Complete carpus
Proximal metacarpals
Patient Instructions
"Remain still during the examination"
Maintain lateral hand position without movement during radiographic exposure
Normal breathing, do not hold breath during exposure
Acceptable Image Characteristics
No rotation
True lateral
Complete inclusion
All structures visible
Adequate exposure
Optimal contrast
No movement
Sharp contours
Common Technical Challenges
Frequent problems in lateral wrist projection:
- Wrist rotation (not true lateral)
- Thumb overlap with carpus
- Exclusion of important structures
- Movement during exposure
- Incorrect placement on divided plate
- Inadequate exposure (overexposed or underexposed)
- Uncomfortable position that patient cannot maintain
- Incorrect centering of beam
Solution: Ensure true lateral position with thumb up and verify complete inclusion of carpus
Clinical Indications
ALIGNMENT EVALUATION IN LATERAL
In true lateral projection should be evaluated:
- Gilula's lines: Smooth and continuous carpal arcs
- Radiocarpal angle: Normally 0-15° of palmar flexion
- Lunate-radius alignment: Congruent articular surfaces
- Scaphoid position: Normal angulation of 30-60° relative to lunate
- Radius-ulna distance: Preserved without abnormal approximation
Any alteration in these relationships suggests joint or ligament pathology.